Aaron Tipping, BASI Level 4 Qualified Ski Instructor and Co-Founder of Maison Sport, shares his top tips for intermediate skiers on how to perform carved turns. If you are comfortable skiing parallel turns and want to take your skiing to the next level, then read on to discover how to carve on skis like a pro!
What is Carving?
Carving is a skiing technique where you perform the entirety of a turn using the ski’s edges rather than skidding or pivoting your feet. Carved turns are arc-shaped, so the tail of the ski follows the same curve as the tip. Carving increases the performance that you get out of the ski as well as the performance of the turn. When you carve successfully, your skis will grip and the tip will bend creating an arc shape, generating more speed from your turns.
How to Carve in 3 Simple Steps:
Step 1: Increase Edge Angle
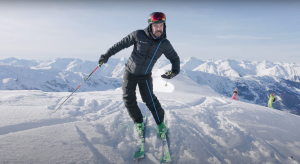
One of the first things you need to think about when learning to carve is increasing the edge angle of your skis. The best way to increase your edge angle is through lateral separation. Lateral Separation is where your upper body and lower body move in two different directions. As you increase the edge angle of your skis at the start of your turn, your knees and hips should come towards the inside of the turn but your shoulders and upper body should lean towards the outside of the turn.
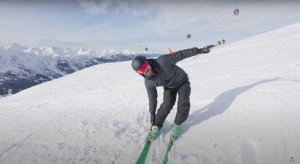
A drill to help with lateral separation is ‘touching the outside boot’. As you perform your turn, try to exaggerate the lateral separation motion and reach to touch your outside boot. Remember to bring your shoulders over the outside ski to maintain pressure and balance.
Lateral Separation:

Touching the outside boot drill:

Step 2: The Transition
The second step of learning how to carve focuses on the transition between turns. Once you start increasing your edge angle and your lateral separation it can be easy to forget to reset the body position before your next turn. It is important to re-centre your hips and move your body forward in the transition to seamlessly enter the new turn.
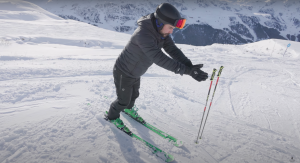
A great drill for practising projecting your body into the next turn is ‘the clap’. As you finish your turn, release your edges and find a flat ski – your hips will be slightly lower than they need to be. Now, as you transition into the next turn exaggerate the forward movement by clapping your hands together over the tips of your skis. This will bring your shoulders and hips forward so that you are in a strong position to start your next turn.
The clap drill:

Step 3: Forward Pressure
The third and final step to perform a carved turn is maintaining forward pressure. Concentrate on squeezing the front of your boots and bringing your shoulders forward as you turn. This will help you to achieve forward pressure on the new outside ski. Our skis bend and flex throughout the turn, so the earlier that you can achieve pressure on the front of the ski for the new turn, the more the ski is going to bend and the quicker you are going to be able to carve.
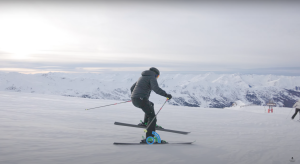
A drill to help practise achieving this forward pressure is ‘lifting the inside ski’. Try to stand on your outside ski as early as you can to create as much forward pressure at the top of the turn as possible. Lifting your inside ski will help you distribute your weight over the front of your new outside ski as early as possible so that you can perform a really strong carved turn.
Lifting the inside ski drill:

Watch the Full Video Over on Our YouTube Channel:
Click below to watch the full video and see Aaron demonstrating these top tips.
Try it Out on the Slopes!
It’s not easy and it will take some practise, but if you follow these expert tips you’ll be able to consistently carve every turn down the hill in no time!
Book a lesson with an expert instructor to help you progress your carving today.
You might also like: Top 5 Ski Resorts for Intermediate Skiers in France